[Photographer's Photography Class] #3: 3 Techniques for Controlling Light
This content is
<The Photographer’s Shooting Class>
series.
Be sure to bring this with you!
- The 3 Elements That Control Light: Aperture, Shutter Speed, and ISO
- Characteristics and Effects of Aperture, Shutter Speed, and ISO
- How to Adjust These Three Elements for Different Situations
If you’ve heard these terms a lot but have never really used them properly,
if you’ve ever bought a camera and looked up how to use it online, or taken even a single photography class, you’ve probably heard the terms aperture, shutter speed, and ISO. But have you ever truly understood these three concepts and applied them to your photography? Are you perhaps hesitating to buy a DSLR camera because you’re overwhelmed by complicated theories and photography jargon?
In this session, we’ll explore the three essential elements for beginners: aperture, shutter speed, and ISO. By the end of this article, you’ll be handling your camera with the skill of a pro, so please stick with us until the very end.
The Three Elements That Control “Light”: Aperture, Shutter Speed, and ISO
It’s no exaggeration to say that photography theory begins and ends with light. The reason these three elements come up every time you search for how to take good photos is precisely because of “light.” This is because, ultimately, a camera is a “device that uses light to form an image.”
And the tools that control the light entering the camera are: ① aperture, ② shutter speed, and ③ ISO. From here on, we’ll take a look at each one—what they do, what effects they produce, and how to adjust them.
[ Please Note ] The methods for adjusting the aperture, shutter speed, and ISO vary by camera model. Please refer to the user manual included with your camera for specific instructions. |
① Aperture
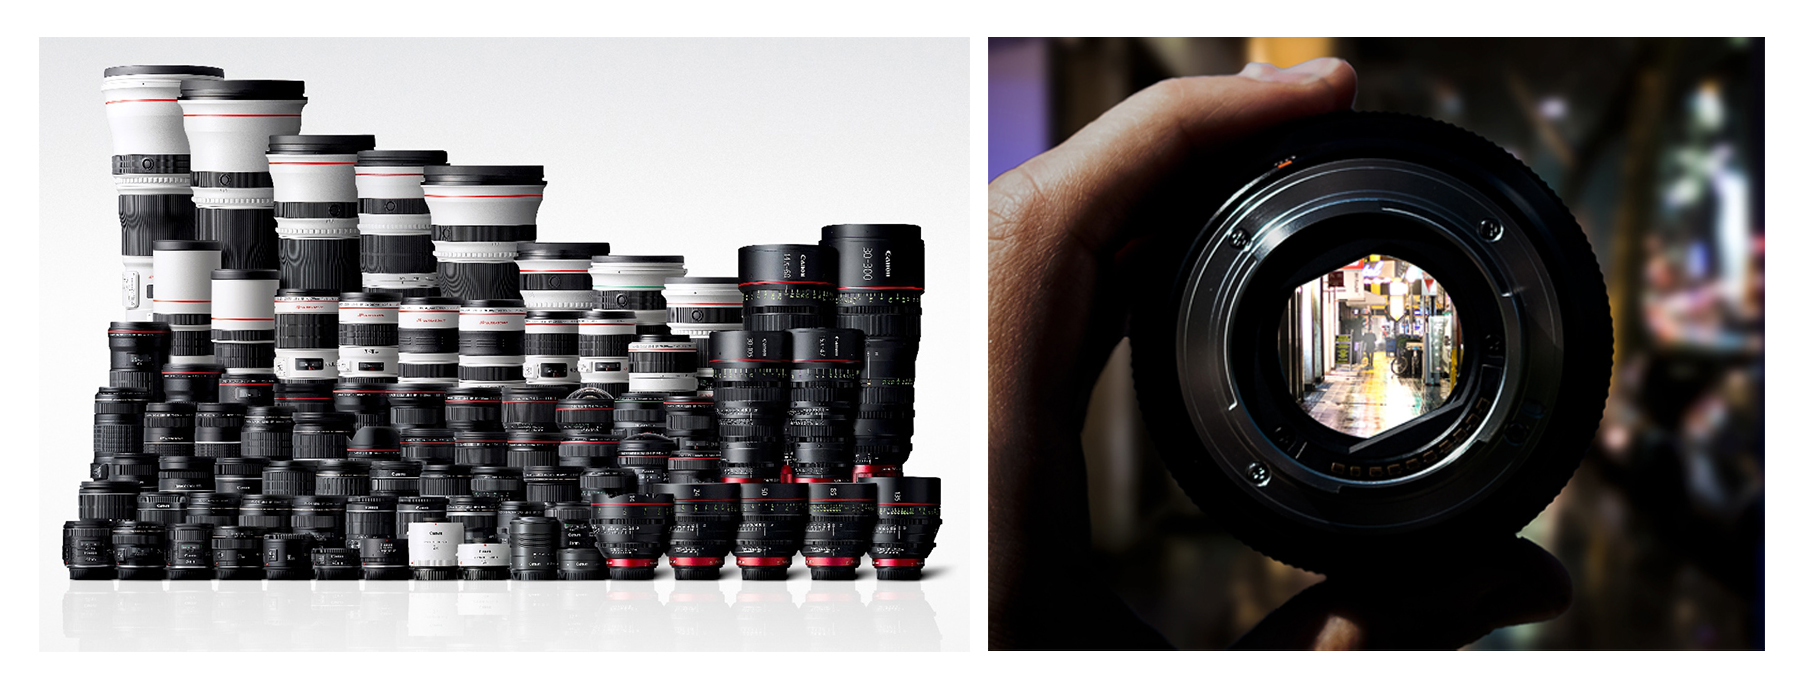
The aperture is the part of the camera that corresponds to the “pupil of the eye” in humans. Located near the camera’s lens, it controls the amount of light entering the camera.
- Just as more light enters when your pupils dilate and less light enters when they constrict,
- opening the aperture to make the opening larger allows more light in, and closing the aperture to make the opening smaller allows less light in.
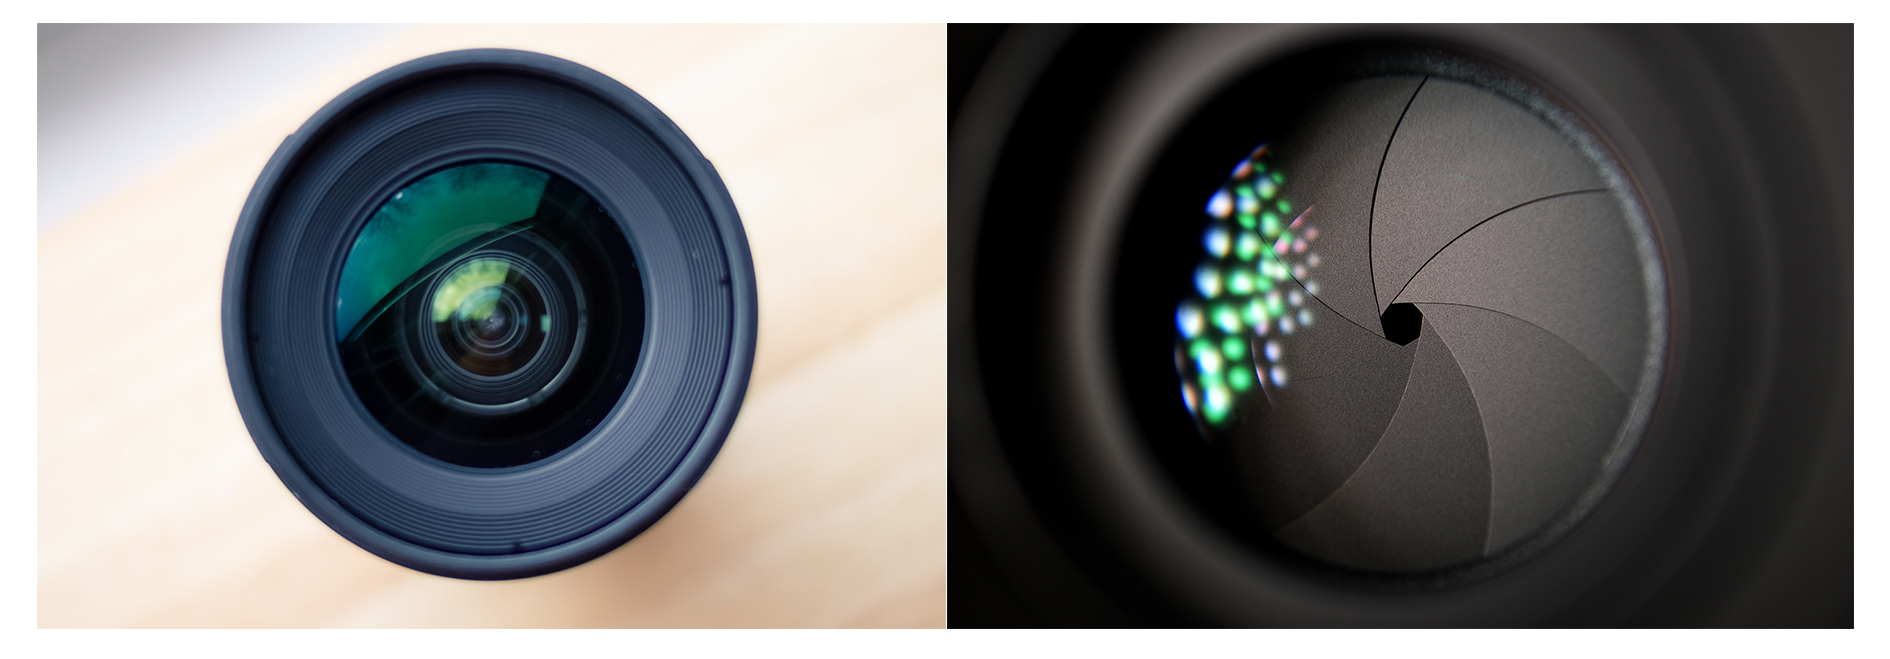
Left: The lens aperture is wide open / Right: The lens aperture is closed
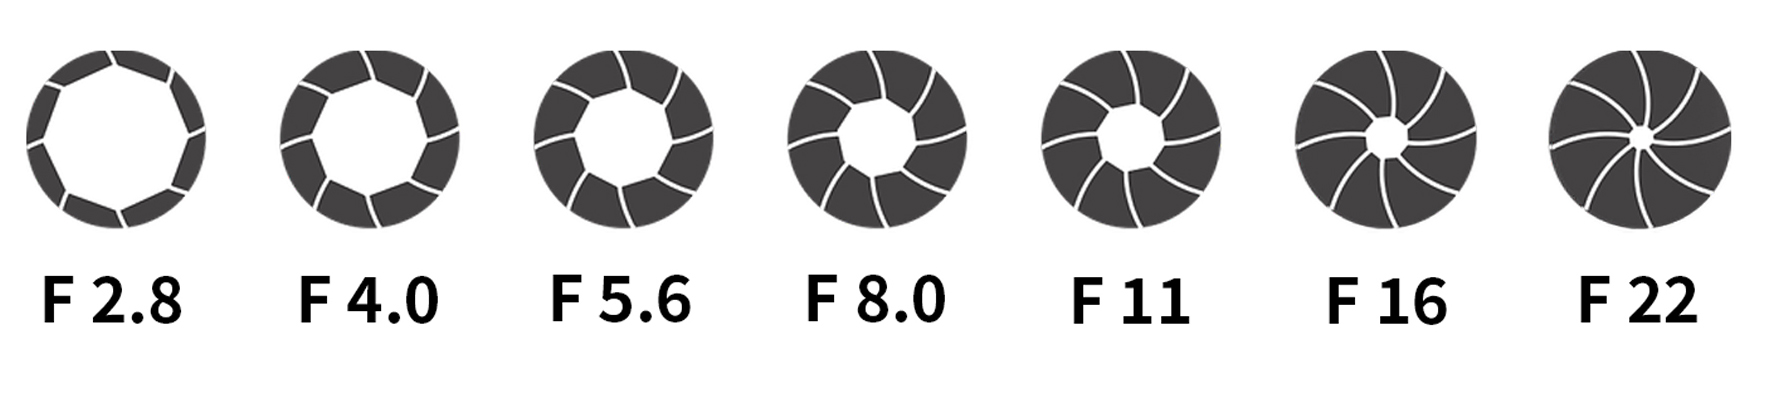
The aperture is the camera’s “f-number”, and the amount of light varies depending on the number following the “F.” This allows you to adjust the amount of light entering the camera according to the lighting conditions at the shooting location. You can also create the desired mood by controlling the light captured by the camera.
- The smaller the F-number, the more the aperture opens, allowing more light to enter,
- and the larger the F-number, the more the aperture is closed, allowing less light to enter the camera.
The aperture also controls the depth of field in a photograph. Simply put, it determines the “range of distances in focus.”
- With a small F-number, only a portion of the subject is in sharp focus (shallow depth of field),
- while a large F-number ensures that everything from the foreground to the background is in sharp focus (deep depth of field).
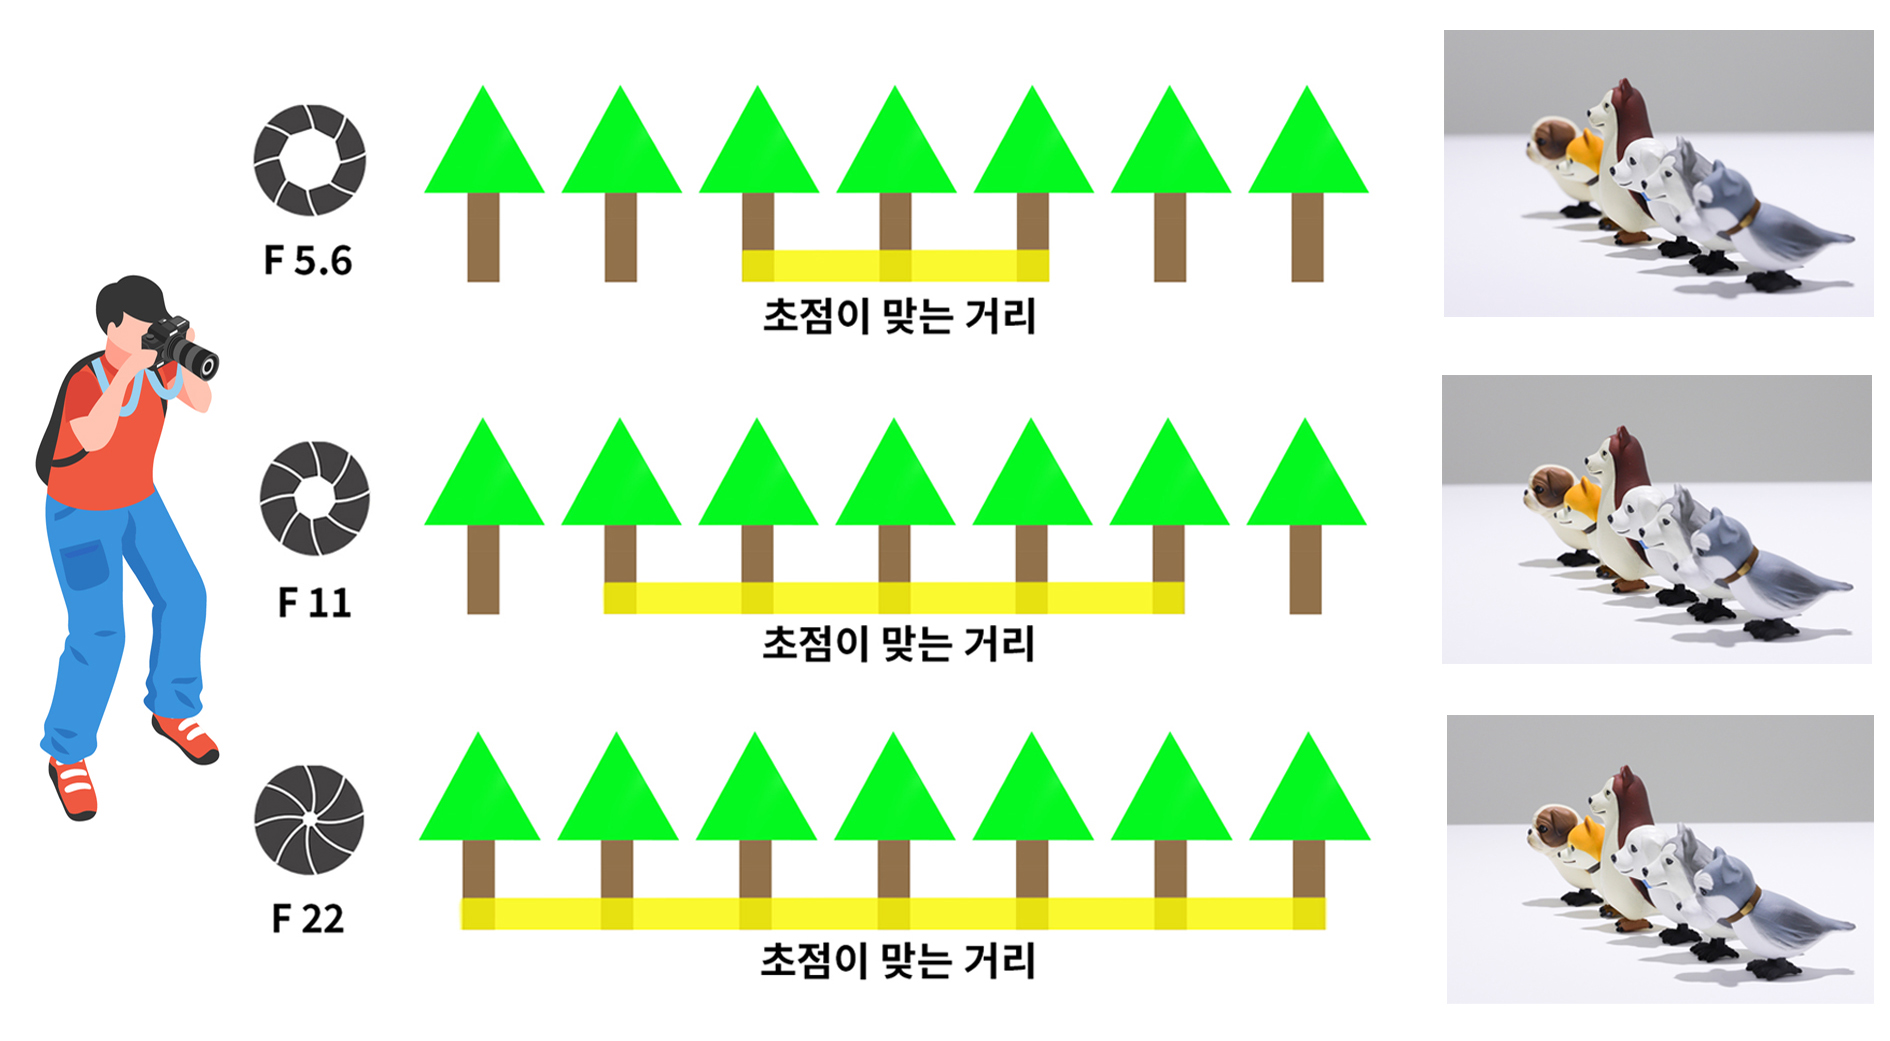
Changes in Focus Due to F-Stop Adjustments
② Shutter Speed
Shutter speed refers to the speed at which the shutter curtain (or mirror) in the camera body opens and closes. You can control the amount of light by adjusting how quickly or slowly the shutter opens and closes.
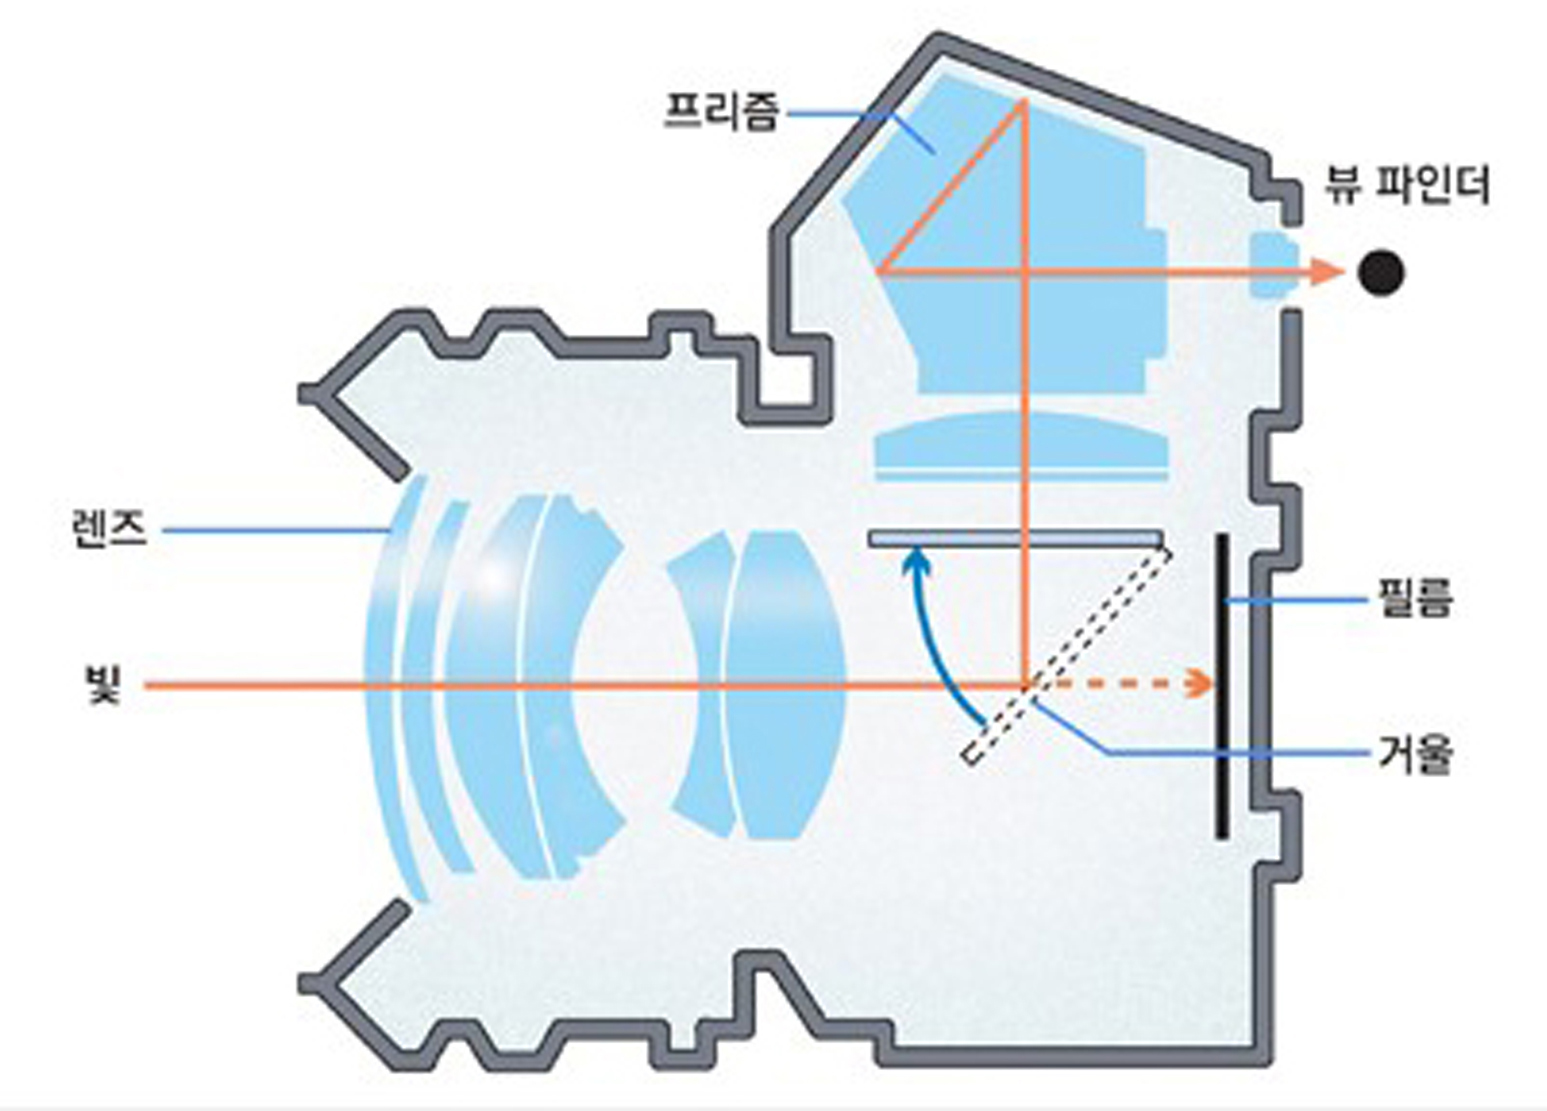
Source: [Naver Knowledge Encyclopedia] Principles of Cameras
Shutter speed is expressed in seconds. You’ll usually see it written as a fraction, such as “1/**” seconds.
- The higher the number, the slower the shutter opens and closes. Since more light enters the camera when the shutter opens and closes slowly, motion blur occurs when photographing moving objects.
- The smaller the number, the faster the shutter opens and closes. When the shutter opens and closes quickly, less light enters the camera, and the resulting image appears frozen in time.
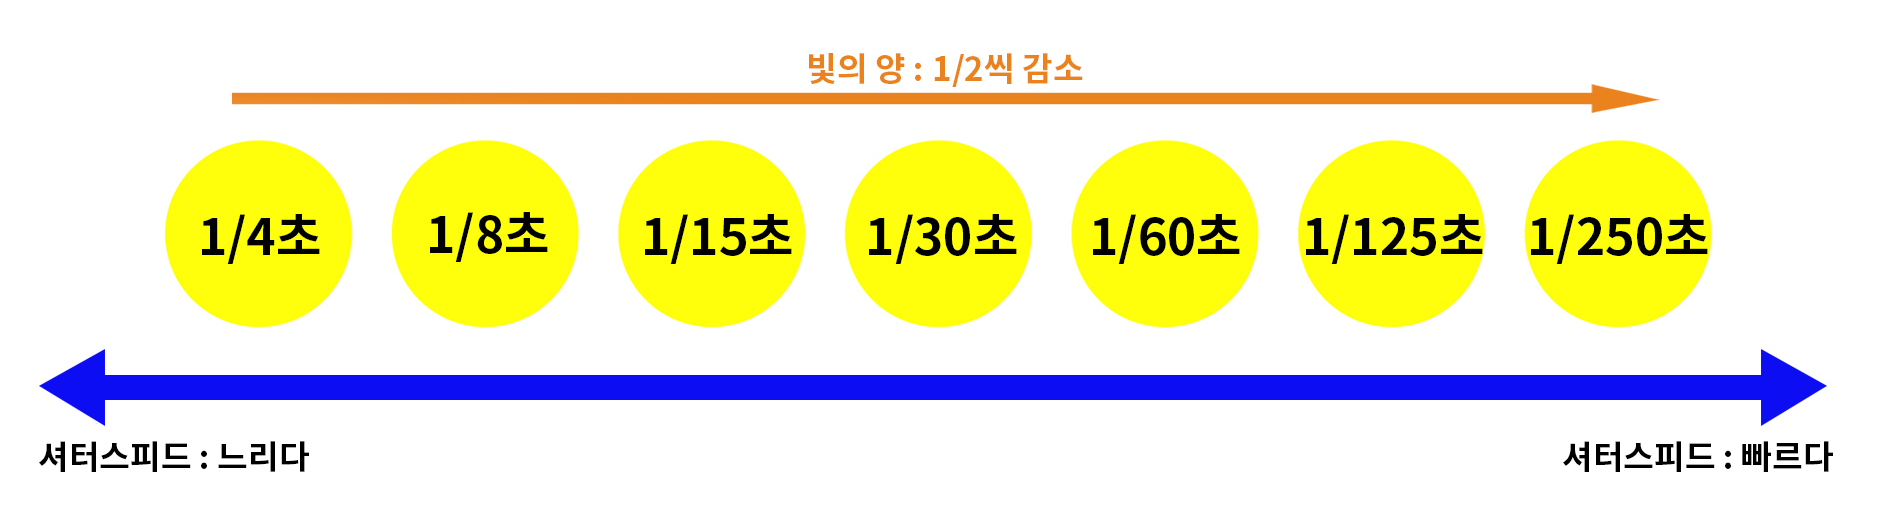
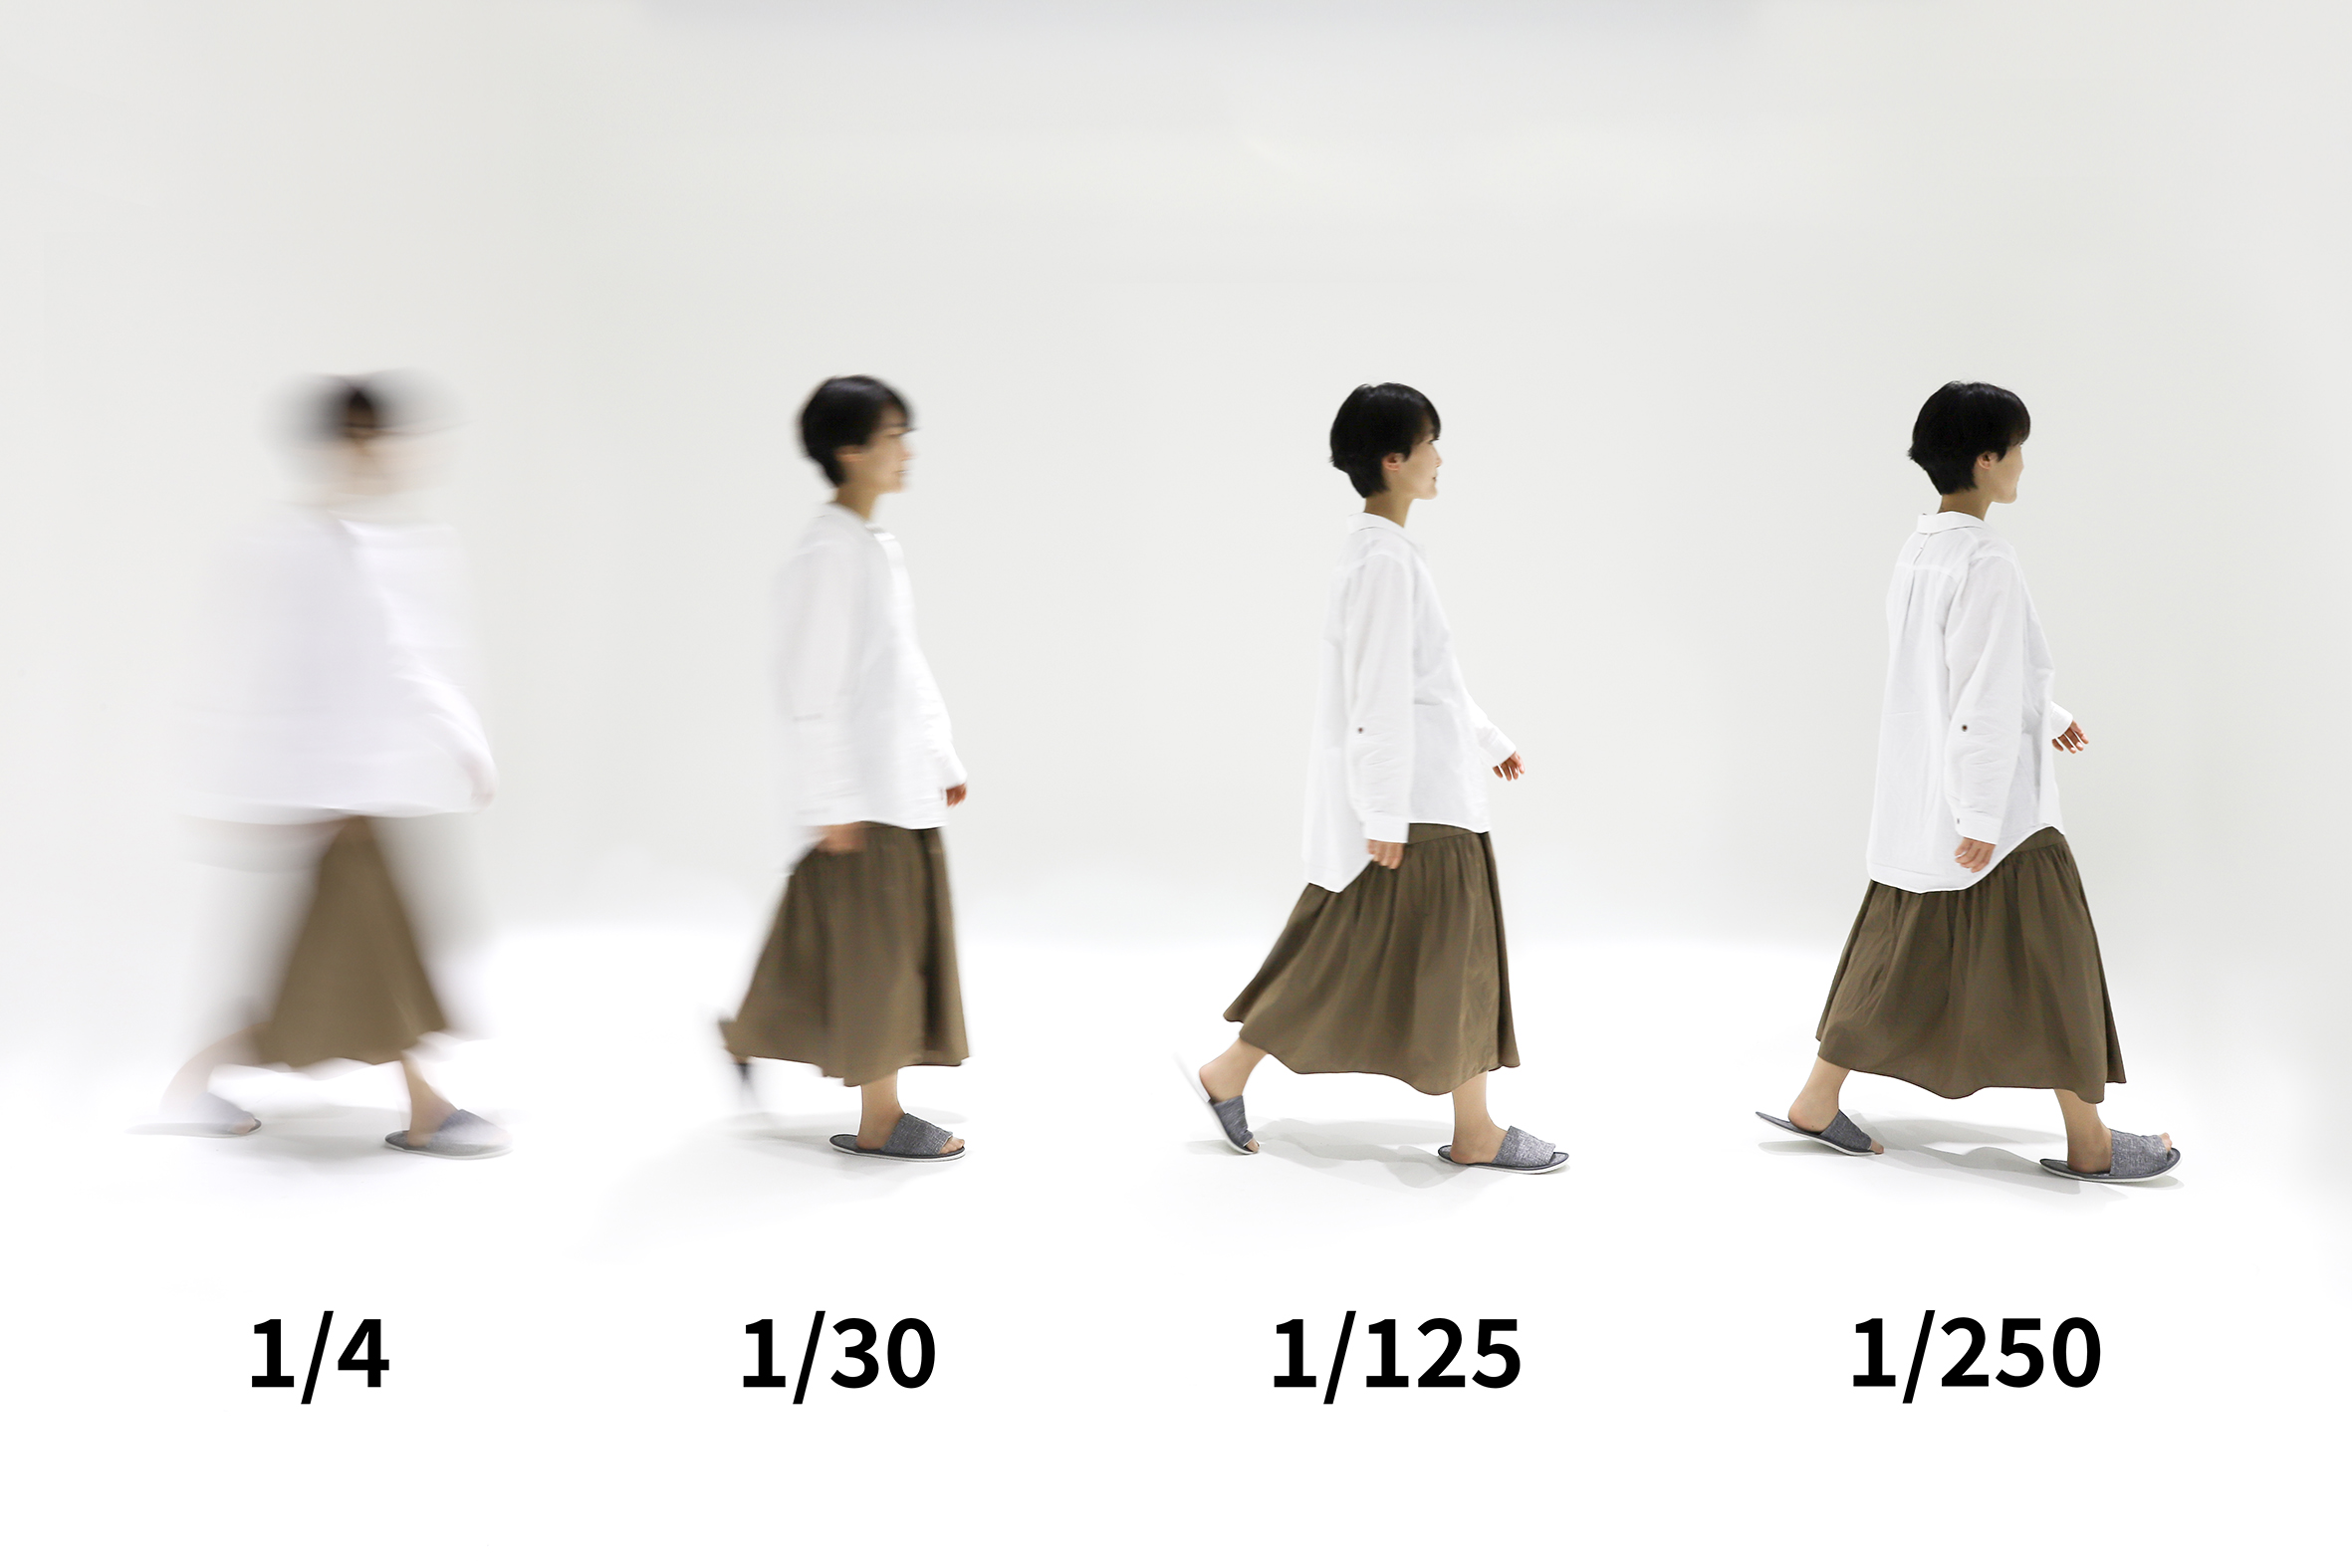
The slower the shutter speed, the more motion blur is captured, and the faster the shutter speed, the more the subject appears frozen in time.
③ ISO

ISO refers to a camera’s “sensitivity” to light. It is a numerical value that indicates how sensitively the camera reacts to light.
- The higher the number, the higher the ISO sensitivity, and
- and the lower the number, the lower the sensitivity.
ISO 400 has twice the sensitivity of ISO 200. This makes it easier to take photos even in low-light conditions.
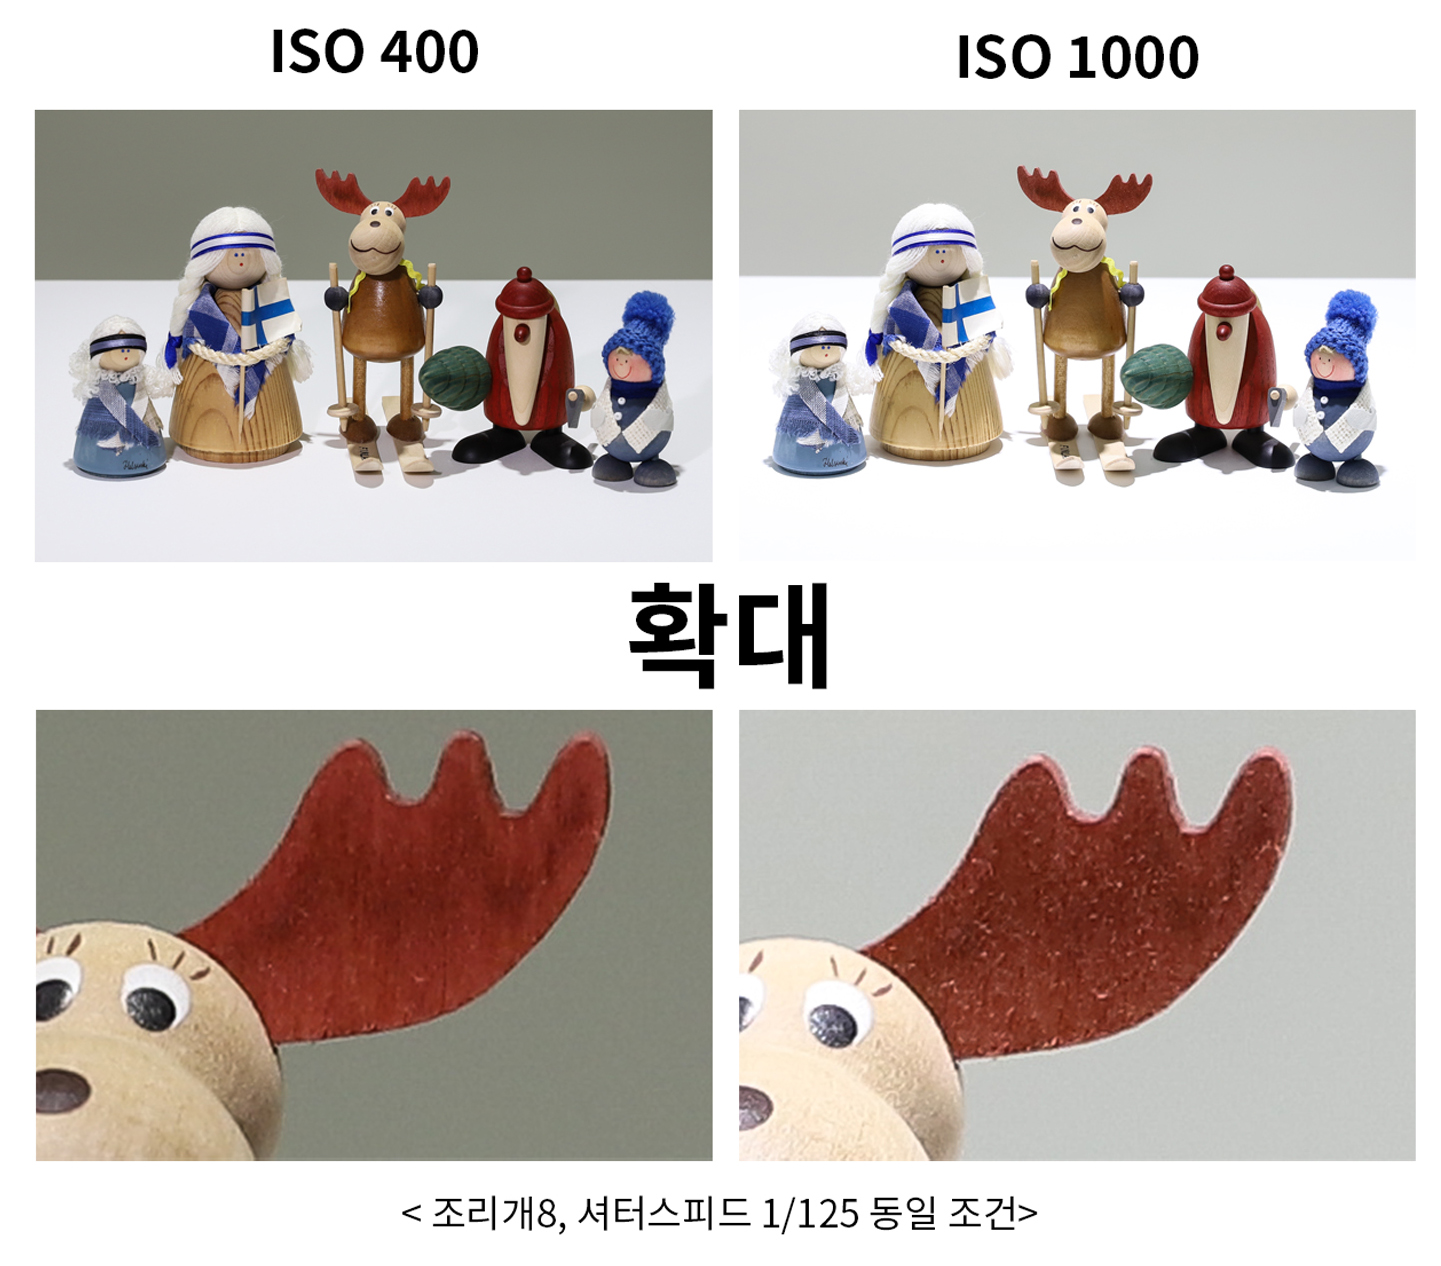
Assuming all other conditions—such as the shooting environment and aperture value—remain the same, if you adjust only the ISO value,
- The higher the number, the more light enters the camera, resulting in a brighter photo. In dark environments, it’s advantageous to increase the ISO setting.
- However, as the ISO value increases, the grain in the photo also becomes more noticeable. As a result, the photo may appear grainy, and the image quality may seem poor.
it is best to first adjust the depth of field (set by the aperture) and the image speed (set by the shutter speed), andthen fine-tunethe ISOto compensate for any remaining lack of brightness.
Controlling Light Using the Three Elements
Combining the three elements of light control—aperture, shutter speed, and ISO—results in the following.
Although they all control the same “light,”
- The aperture affects
- shutter speed affects motion in the image,
- ISO can directly affect grain.
if you can understand and adjust these three elements well, you’ll be able to shoot in a wide variety of environments. You’ll know which settings to adjust when it’s dark and there’s little light, when you need to capture a moving subject, or when you want to take a “bokeh” photo with the product in focus and a blurred background.
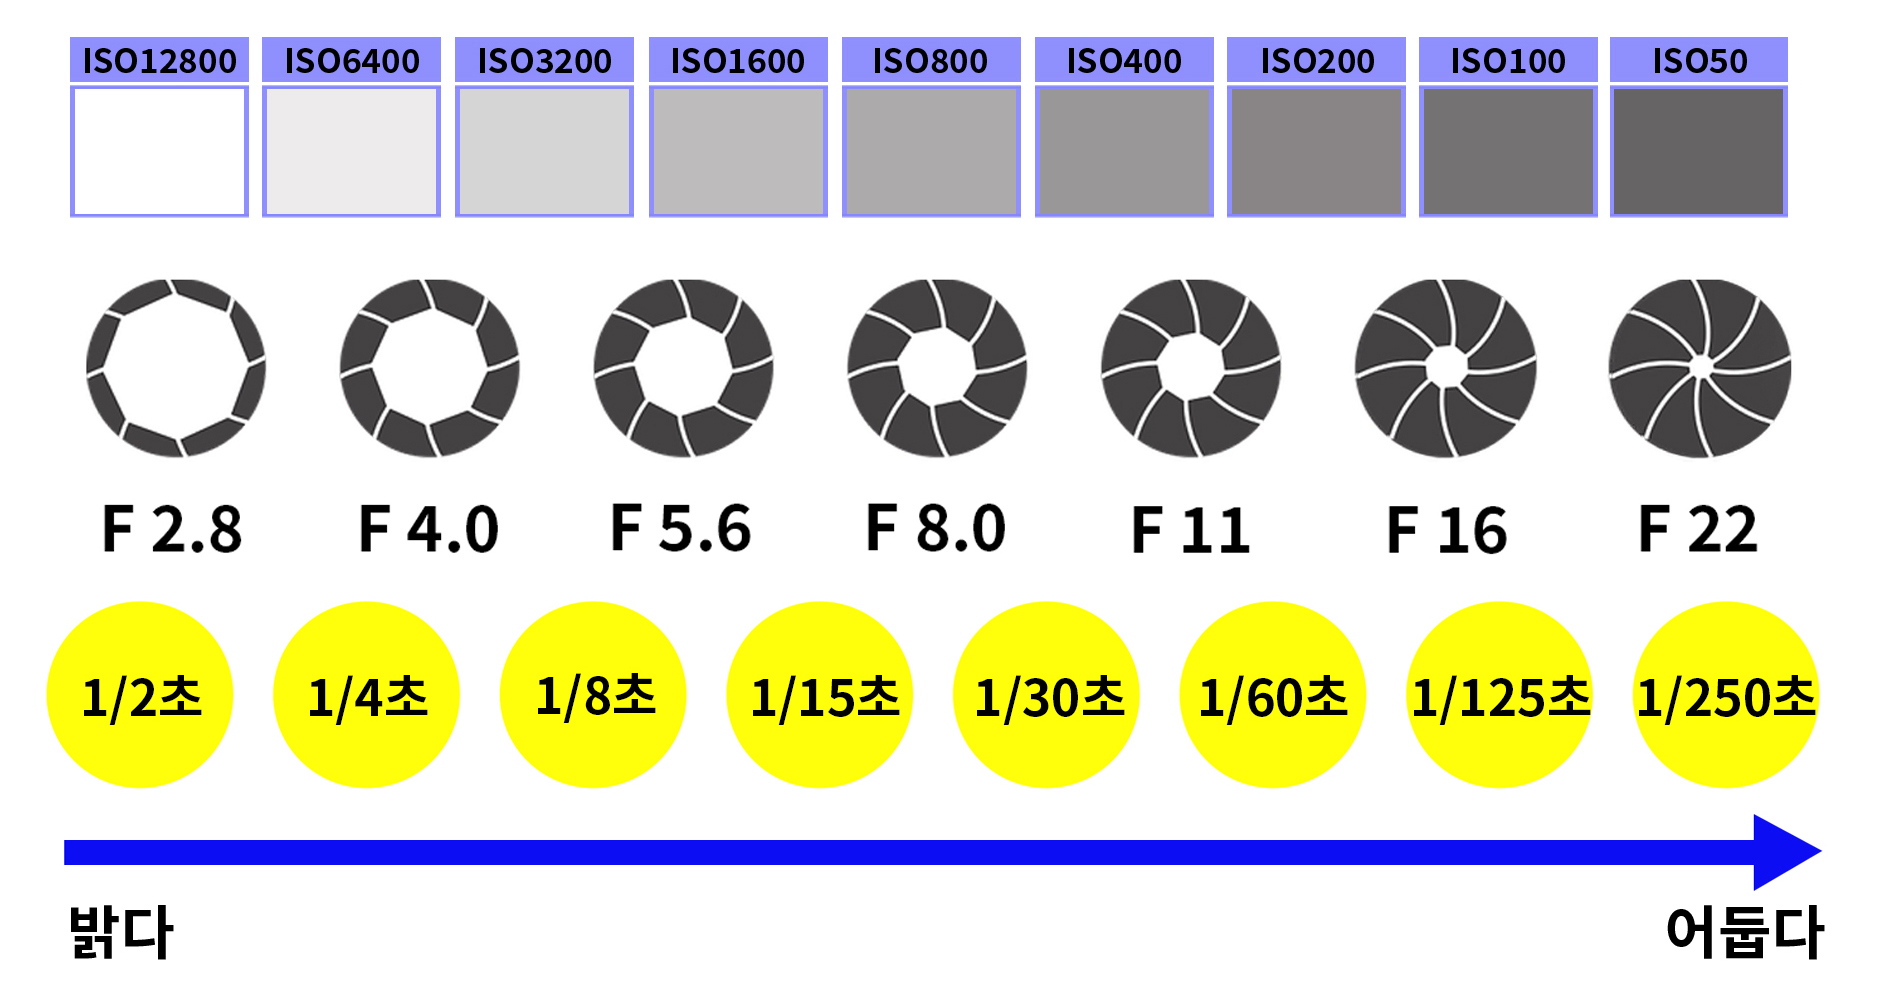
But theory is just theory! Please don’t forget that it’s a hundred times better to get up, head outside with your camera, and get hands-on experience with these three elements.
To move on to hands-on shooting practice and applying the theory, Episode 4 of the [Photographer’s Shooting Lessons] serieswill continue with camera dial operations based on what we learned today.
<A Photographer’s Shooting Class> Series
Written by Park Bo-seul |Planned and Edited by Lee Eun-ah| Photos by Park Bo-seul, Pexels