[Product Photography Tip #1 for Detail Pages] How to Take Professional-Looking Photos with Your Smartphone
Be sure to keep this in mind!
- You can take great photos with just your smartphone—no expensive camera needed.
- Here are some camera settings to help you take great photos.
- Arrange your products in a well-composed shot and upload them to your product detail page.
How can you take great product photos?
Even if you just follow the basics, you can create “usable” photos for your wadiz product page.
Even setting aside the various external factors beyond your control, many people believe you need an “expensive camera” to take good photos. Well, that’s half true and half false. If you have an expensive, high-quality camera and lens, you can certainly take higher-resolution photos more easily. However, equipment alone will never magically produce great photos. How can I say that? It’s all based on my own experience.
This series on the know-how for creating commercial photos without an expensive camera consists of four parts. In this first installment, I’ll cover how to use your smartphone camera, composition, basic lighting, and basic setup techniques (backgrounds, props, etc.). In this post, I’ll explain how to shoot with a smartphone camera andhow to arrange products for the best composition.
Initial Smartphone Camera Settings for Professional Use
Depending on how you use it, a smartphone camera can produce quite impressive results. Of course, using a smartphone camera as your primary camera for commercial purposes might be a stretch, but if you’re a maker who doesn’t yet have the right equipment, you can still take great photos simply by mastering your smartphone camera, composition, lighting, and settings.
Enabling Grid Lines / Aligning the Horizon
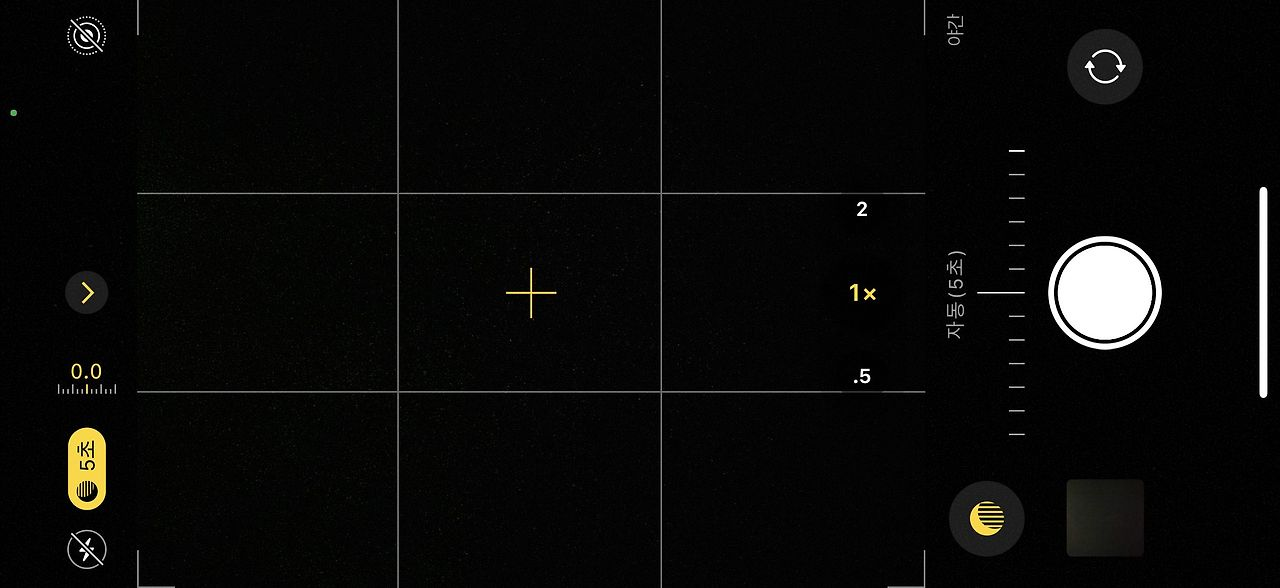 It’s often said that to take a good photo, you should follow the “rule of thirds.” However, when shooting with a smartphone, simply ensuring the product is level is a successful first step. Most people find it easy to align the left-to-right horizon. What’s often overlooked, however, is the top-to-bottom horizon. This is because many people tend to shoot while crouching, rather than aligning the product with the camera’s position. The worst habit when taking photos is using an “ambiguous angle.” We’ll cover this in more detail in the section below.
Adjusting Exposure in HDR Mode
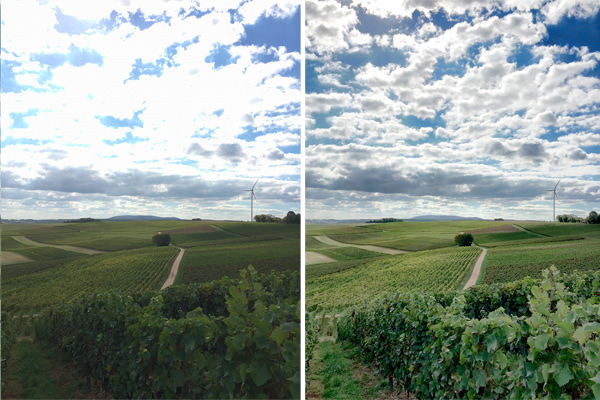 Left: Photo taken without HDR mode (LDR) / Right: Photo taken with HDR mode
Unlike the human eye, a camera cannot capture both bright and dark areas at the same time. To overcome this, the HDR feature allows you to balance the exposure between the dark and bright parts of the photo. It is particularly effective in backlit situations—such as when shooting next to a bright window, where deep shadows form or the product appears dark.
On most recently released smartphone cameras, the HDR feature is enabled by default. If HDR is turned off, we recommend keeping it on unless you’re intentionally trying to capture a high-contrast photo.
PRO Mode (Expert Mode) for Experienced Users
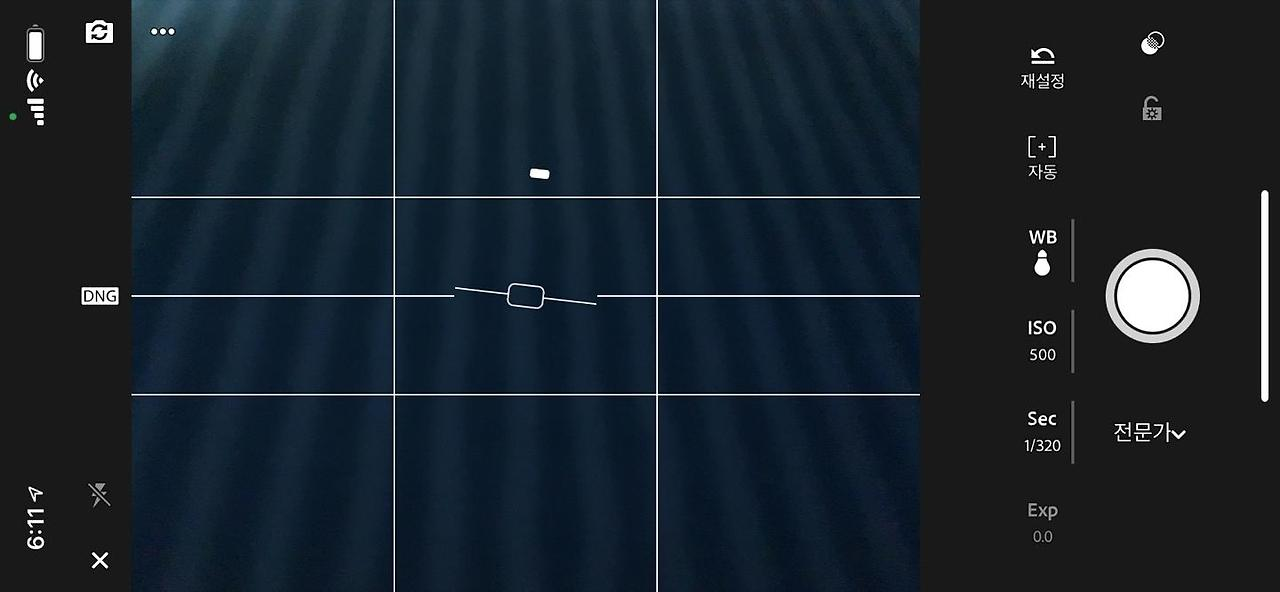 On Android phones, you can adjust detailed settings in PRO mode. Try taking photos while adjusting the three key settings: ISO, aperture (f-stop), and shutter speed.This allows you to capture more artistic photos that wouldn’t be possible instandardAuto mode. By experimenting with simple adjustments to white balance, ISO, and shutter speed, you can easily grasp the fundamentals of how a camera works. Above all, the on-screen display makes it intuitive to predict the final result. Since these techniques will be useful whenever you operate a camera in the future, feel free to experiment without pressure—think of it as a learning experience.
 The iPhone’s default Camera app does not support Pro Mode. Therefore, if you want to shoot in Pro Mode, try installing the “Lightroom” app from Adobe.You can maximize your camera’s performance by usingProMode.
In addition, you may find it helpful to check out tips such as increasing photo size (the option to save as the largest file), wiping the lens beforehand (if your photos come out blurry or hazy, it’s almost certainly because the lens is dirty), and avoiding the use of portrait or food editing apps for product photography.
Composition
The three most commonly used compositions on location are 45-degree angle, head-on, and top-down views. You can create variations by shifting left, right, or straight ahead (or clockwise and counterclockwise for top-down views). I’ll explain these in detail with example photos.
Front-Facing Composition
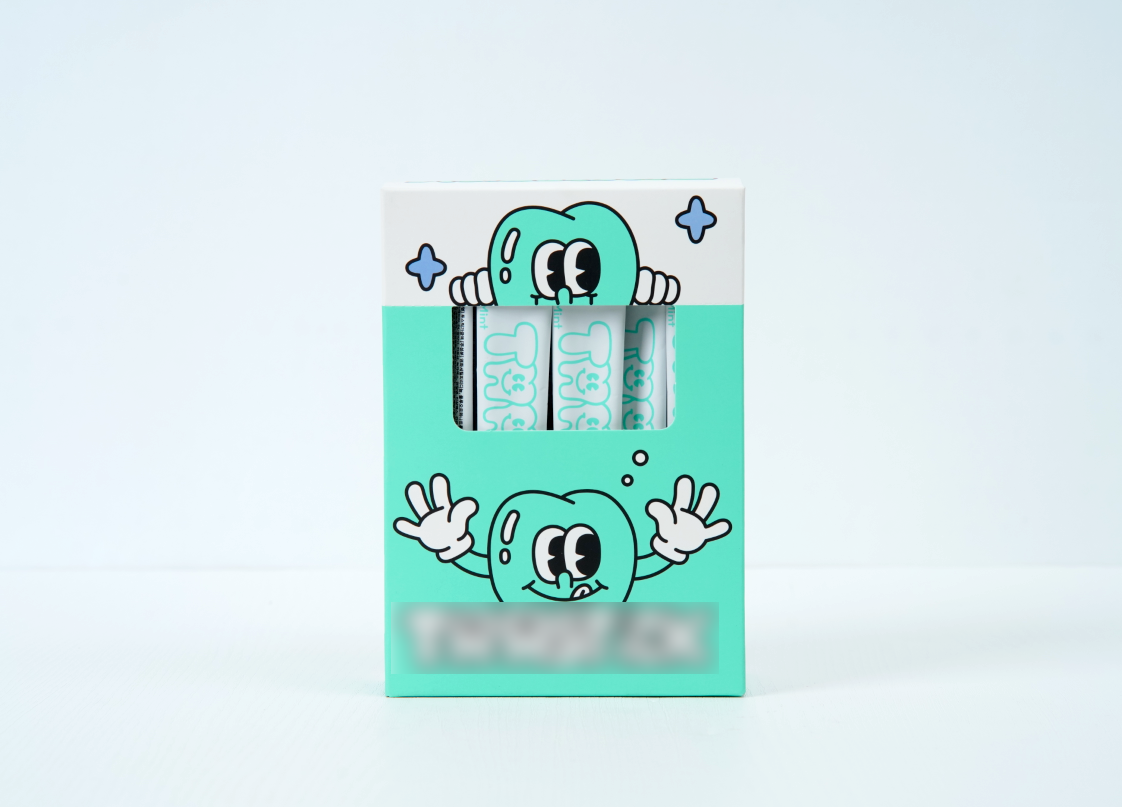
The front-on composition is used for product cutouts or to make the product itself stand out. Unless you have other specific requirements, shooting from the front is usually the safest bet. As explainedearlier , a straightforward front-on composition feels much more comfortable to the eye than an “unconventional angle.” If the floor is visible in the shot, it’s best to frame the shot so that some portion of the floor is visible; for product cutouts, it’s best to shoot so that the floor appears as a line rather than a solid surface.
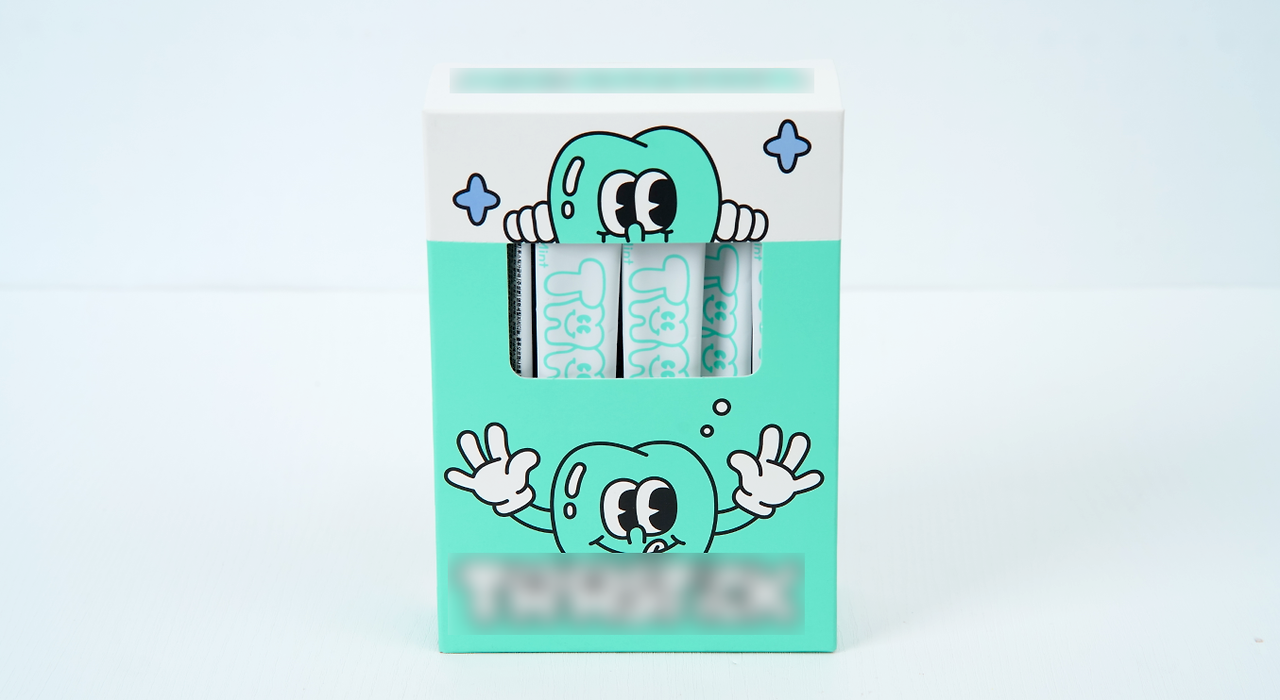 When shooting a front-facing shot, the “horizontal alignment” mentioned earlier is also important. While you may intentionally vary the angle depending on the situation, if you need to show the front, it’s safest to clearly show the front. If you photograph a product at an ambiguous angle—neither head-on nor at eye level, as shown in the photo above—the image will be distorted and difficult to use. If it’s hard to judge the front, simply check whether the product’s left and right sides are parallel to each other.
45-Degree Angle
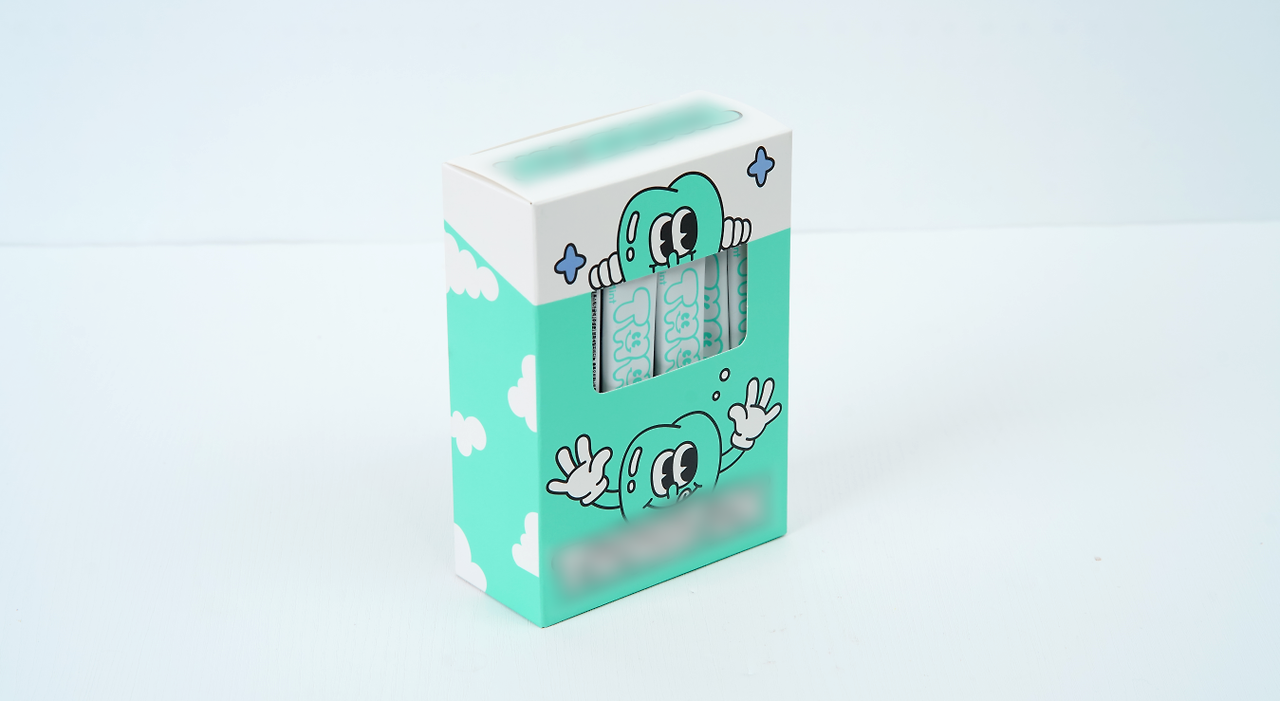 A 45-degree angle might sound complicated, butit’s easier to understand if you think of it as an “eye-level composition.” This is an angle where you look down at a product on a table at an angle of about 45 degrees.For a 45-degree angle, it looks more stable if the product is tilted slightly to the left or right rather than facing straight forward.Positionthe cameradirectly in front of the product and move it up and down to find the angle that looks most stable.
Top View
 This angle is commonly referred to as an “aerial shot.” If the product isn’t very tall and there isn’t much height difference between it and the surface, you can capture a more appealing photo using a top view rather than a front view. Since it’s difficult to conveythe product’s heightthis way, it’s best to lay the product flat if it’s tall. Additionally, since a top view allows you to capture not only the product but also the surrounding setup, it’s ideal for creating atmospheric photos or showcasing the ingredients of desserts and other items in a single shot . This angle is commonly used when photographing food, accessories, and general merchandise.
The Beauty of Negative Space
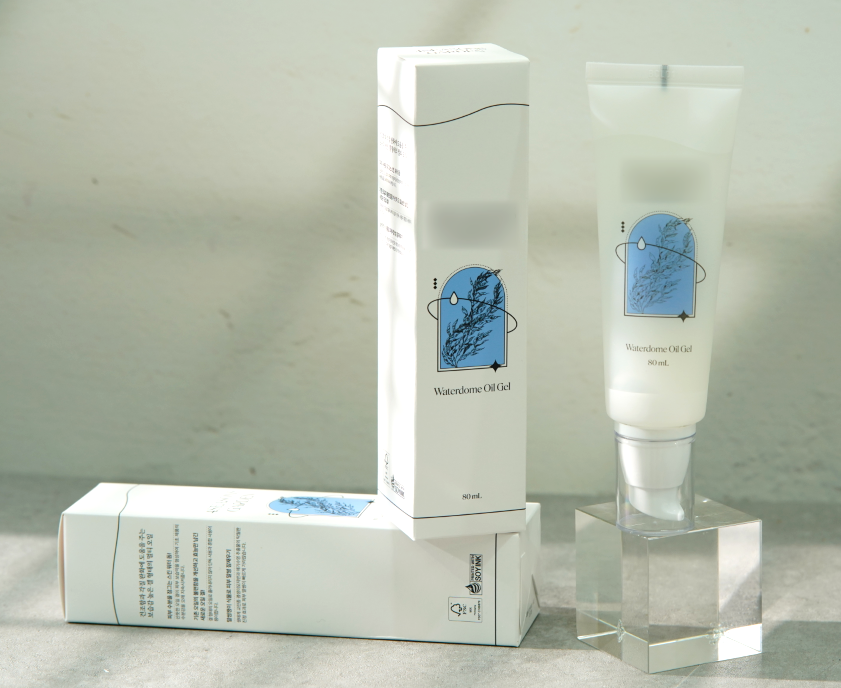 When taking product photos, if the product fills the frame too tightly, the image becomes difficult to use and may look cramped. While excessive negative space is certainly not ideal, leaving some room around the subject can result in a more balanced-looking photo and makes it easier to crop the image later. Photographers also intentionally leave negative space when shooting, anticipating the need to overlay text on the image.
I hope this has helped ease your anxiety about photography. In the next post, I’ll cover backgrounds, props, and lighting setups.
Makers, check out the services that suit your needs!
- Learn how to [Get Started] with a wadiz project
- Check out the [Maker Events] currently open for registration
- Watch [wadiz funding lectures] led by funding experts
- Launch a project with a [wadiz Official Partner]

Written by Jeon Su-yeon ,GenieCloud Editor