[Product Photography Tips #5] How to Use Lighting to Take Your Photos to the Next Level
This content is
<Product Photography Tips for Detail Pages>
series.
Don't forget to bring these!
- We’ll show you how to use lighting to determine the quality of your photos.
- You’ll find everything from recommended lighting for different situations to setup methods for beginners.
- For beginners, we recommend starting with continuous light.
Lighting Tips for Beginner Photographers
“Lighting” is an essential element of photography. While it may seem like the most challenging aspect, artificial lighting is actually the easiest element to control during a shoot. This is because, as long as you have the same lighting setup, you can achieve similar results no matter where you are.
Starting to use lighting also means you’ve moved beyond the beginner stage. Lighting can be broadly divided into continuous light andflash .To achieve results that can be described as “commercial photography,” while continuous light is important, it’s also crucial to use flash—commonly called a “flash” or “strobe”—appropriately.
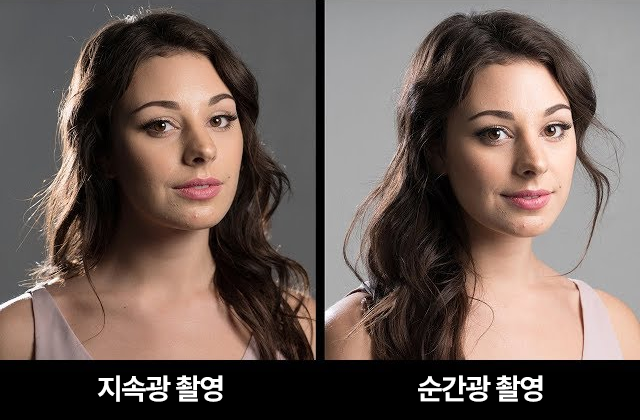 Comparison of Continuous Light and Flash Photography – They may look similar, but there are significant differences, from how they work to the final results.
Continuous Light
As the name suggests, continuous light emits light continuously, just as you see it.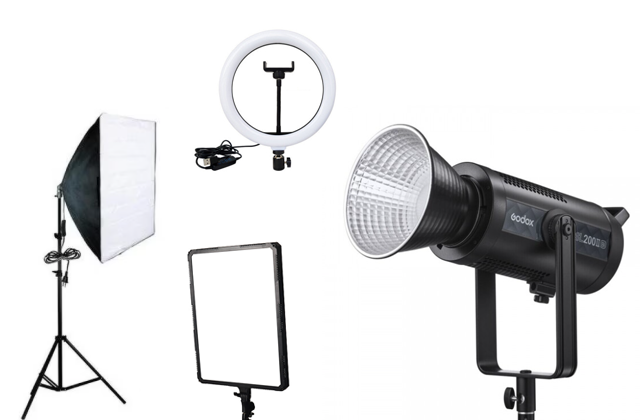
✅ It allows for intuitive lighting setups and is effective for short videos used in GIFs.
✅ Since you can observe and adjust the subject while the light is on, it’s recommended for beginners.
✅ Compared to flash lighting, it has lower light output (ranging from small lights with 10W output to those with around 100W) and has the drawback of struggling to illuminate large spaces.
Continuous light products come in various forms. Options range from basic models combining LED lamps and softboxes to omnidirectional lights ideal for shooting small objects, and easy-to-install LED panel lights. If you’re just starting out with continuous light, we recommend purchasing two continuous light units with softboxes and placing them on either side of your subject. If space is very limited, you can place one continuous light on one side and use a reflector on the opposite side to supplement the light.
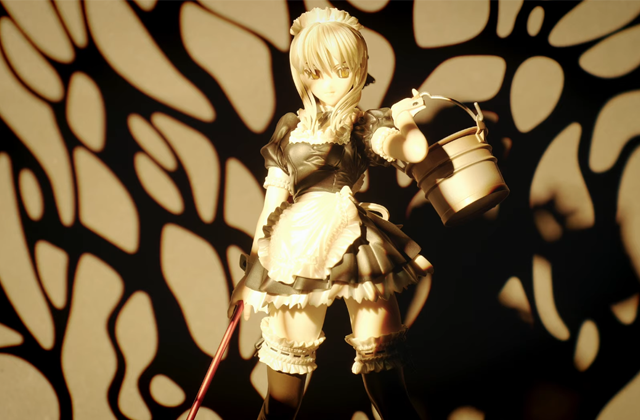 Example photo of a projection attachment in use / Source: Red Mirage TV YouTube
There’s also a slightly unique type of continuous light product: the projection attachment. This accessory is designed to be used in conjunction with a continuous light source; by inserting a “gobo”—a patterned light filter—it allows you to create various lighting effects. It features the ability to create leaf-shaped shadows to give products a more atmospheric look, or to adjust the shadows to highlight subjects. If you want to create unique photos, why not try using this type of continuous light?
Flash
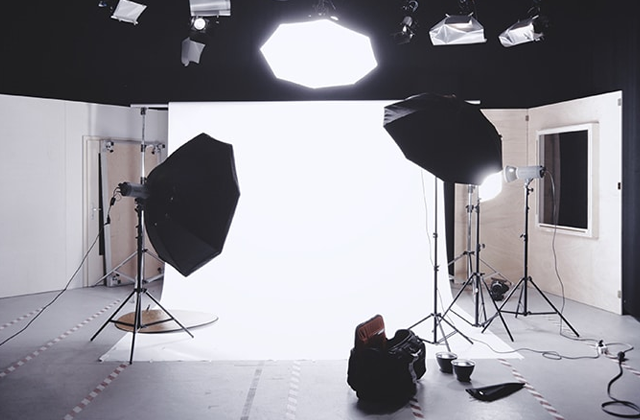
It emits a strong beam of light for a very short period of time.
✅ Unlike continuous light, it’s ideal when you want to minimize the influence of the surrounding environment.
✅ With an output of at least 200W, it has the advantage of illuminating a space brightly and broadly.
✅ Since it must be used with a device called a “synchronizer” to synchronize the camera’s shutter with the flash’s emission, it’s recommended for intermediate users and above.
✅ Since the light doesn’t emit until you press the shutter and the sync trigger activates, it’s difficult to preview the results.
Since strobes produce intense light, they require more careful adjustment. It’s best to position the light at an angle—either diagonally or from the side—and use a reflector or diffuser. To ensure even lighting, maintain a distance of at least 1–2 meters between the subject and the strobe.
Additionally, you can create different effects depending on the number of strobes you use. Using a single strobe creates a high-contrast photo where the areas hit by the light are bright and the rest are dark. Using two strobes appropriately makes it easier to capture the product most naturally while adding a sense of depth. If you use three lights—including a top light shining down from above—you can take photos that further highlight products like food or jewelry.
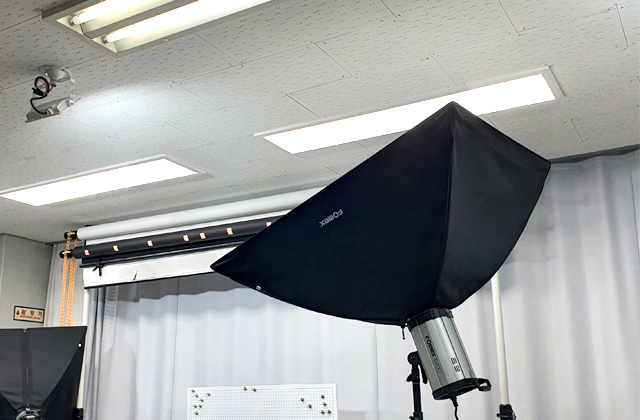 If you have to use only one flash, don’t worry too much about its position—just set it up so it’s pointing upward and increase the brightness. This technique is called “bounce lighting,” which involves reflecting the light off the ceiling or walls to indirectly illuminate the entire space. Instead of harsh direct light, it provides soft, evenly diffused light, making it easy to achieve natural-looking photos with just a single light source.
Setting the angle slightly less than 90 degrees—rather than exactly 90 degrees—yields a better reflection angle. Keep in mind that since the light reaches the product indirectly via reflection, you’ll need to increase the light output more than usual.
Other Equipment Needed Besides Lighting
Reflector
A reflector is a tool that brightens dark areas to balance the light; a silver reflector provides strong light reflection, while a white reflector provides soft light reflection.
Even when using natural light without artificial lighting, you can naturally eliminate dark shadows by placing a reflector on the opposite side of the sunlight. If you don’t have a reflector, try using aluminum foil, white paper, or a Styrofoam board as a simple substitute.
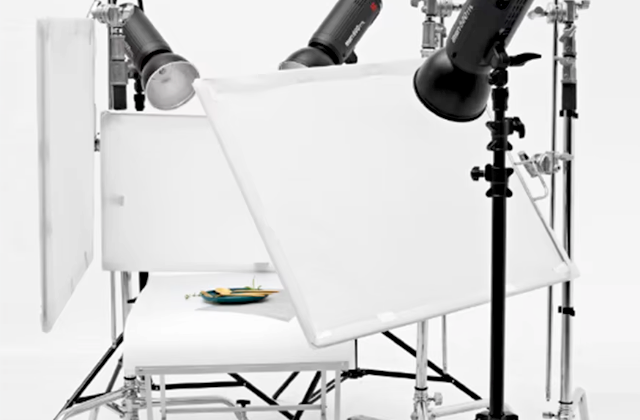
Diffuser
A diffuser softens and spreads the light, reducing harsh shadows and creating natural lighting.Accessories such assoftboxes andumbrellas also fall under the category of diffusers.
Using a diffuser provides broad, even light, allowing for natural-looking results. If you don’t have a diffuser, you can substitute it with a large, thin sheet of white paper (that lets light pass through) or a thin white cloth. While this may reduce the light intensity slightly, it effectively softens shadows and brightens the overall tone of the photo.
When practicing lighting, start by studying the relationship between light and shadow using a single light source. Try placing the light source next to or behind the subject to explore silhouette effects, or use a diffuser and reflector together to create balanced lighting. In small spaces, using walls and ceilings to bounce light is also a great way to practice. This is because you’ll often discover unexpected results from lighting setups you hadn’t even considered.
Lighting may seem difficult at first, but as you shoot more, there will come a moment when you naturally see where and what kind of lighting to use. Since lighting setup is just as important as the shoot itself, I hope you’ll test out various lighting setups to achieve great results.
<Product Photography Tips for Detail Pages> Series
- [Product Photography Tip #1] How to Take Professional-Looking Photos with Your Smartphone
- [Product Photography Tip #2 for Detail Pages] How to Take Product Photos Using Only Your Smartphone
- [Product Photography Tip #3 for Product Detail Pages] Photo Editing Techniques That Make Viewers Stop Scrolling
- [Product Photography Tip #4 for Detail Pages] Expert Tips for Photographing Different Types of Products
- [Product Page Photography Tip #5] Photo Editing Techniques That Make Users Stop Scrolling

Written by GenieCloud, Edited by Jung Yu-jin